If you’ve been using CPAP therapy for a while, you already know that comfort isn’t guaranteed just because the machine is running. Some nights feel perfect—steady airflow, deep sleep, fewer awakenings. Other nights, the pressure may feel too strong, your mask leaks more than usual, or you wake up with dryness, bloating, or congestion. The truth is simple: your CPAP settings play a major role in your comfort and how well the therapy works.
Learning how to adjust CPAP settings for better comfort and fewer side effects can make a dramatic difference in your sleep quality. You don’t need to be a technician to understand these adjustments—you just need to know what each setting does and how it affects your experience. In this guide, we break down the key CPAP settings, how to fine-tune them safely, and what to change when you’re dealing with common CPAP problems.
Understanding Pressure Settings and How They Affect CPAP Comfort
The pressure setting is the heart of your CPAP therapy. Too high, and you may feel overwhelmed by airflow. Too low, and your airway may not stay open enough to prevent apnea events. When the pressure is not aligned with your comfort and breathing pattern, you may experience headaches, air leaks, stomach bloating, or even difficulty falling asleep.
Signs Your CPAP Pressure Needs Adjustment
- You wake up with shortness of breath or chest tightness
- Air feels too forceful when you inhale
- CPAP mask leaks increase suddenly
- You feel like you’re suffocating when the machine starts
- You experience aerophagia (air swallowing)
If these issues sound familiar, you may need to adjust your pressure settings or talk with your sleep specialist about switching to auto-adjusting mode.
How to Adjust CPAP Pressure Settings for Better Sleep (Primary Keyword Used)
If you use a fixed-pressure CPAP, your machine delivers one constant pressure all night. Many users report discomfort with this approach because your needs change during different sleep stages. On the other hand, auto-CPAP (APAP) machines automatically adjust pressure moment by moment.
Tips for Adjusting CPAP Pressure Safely
- Never increase pressure dramatically. Small changes—0.5 to 1 cmH₂O—are usually enough.
- Observe your comfort for a few nights. Don’t judge a change by one night’s sleep.
- Track symptoms. Less dryness, fewer leaks, and deeper sleep indicate the right direction.
- Work with your sleep doctor when possible. They may recommend a new pressure range instead of one fixed value.
Proper pressure adjustment is one of the most effective ways to reduce uncomfortable side effects.
Using Ramp Settings to Improve CPAP Comfort and Reduce Pressure Shock
Many users struggle with the feeling of full pressure the moment they put on their CPAP mask. That’s where the ramp feature helps. Ramp starts your therapy at a lower pressure and gradually increases it as you fall asleep.
When to Adjust Ramp Settings
- You need more time to relax before full pressure kicks in
- You feel overwhelmed by strong airflow at the start
- You have difficulty falling asleep with CPAP on
Increasing the ramp time or lowering the starting ramp pressure can create a smoother, calmer transition into sleep.
Adjusting EPR (Expiratory Relief) to Reduce CPAP Side Effects
EPR—also called pressure relief—reduces the pressure as you exhale. This small adjustment makes breathing feel more natural and helps prevent air swallowing and chest discomfort.
Who Benefits from EPR Adjustments?
- Side sleepers who feel too much resistance when exhaling
- Users experiencing bloating or discomfort
- People who wake up frequently feeling “out of breath”
Setting EPR to 1, 2, or 3 allows your machine to subtract small amounts of pressure during exhalation, making breathing smoother and helping you stay asleep longer.
Humidity and Temperature Adjustments to Prevent Dryness and Congestion (LSI Keyword: CPAP Humidity Settings)
Dry mouth, dry nose, and nasal congestion are some of the most common CPAP side effects. They often happen because the humidity settings are too low—or too high.
Increase Humidity If You Experience:
- Nosebleeds
- Dry nasal passages
- Morning sore throat
- CPAP dry mouth
Decrease Humidity If You Notice:
- Water in your tubing
- Dampness in your mask
- Morning congestion
- “Rainout” dripping inside the hose
Heated tubing can also help stabilize moisture and prevent condensation.
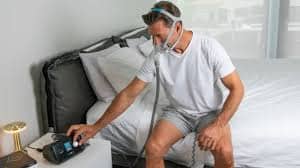
How to Adjust CPAP Mask Fit to Reduce Leaks and Improve Pressure Control
Even if your pressure settings are perfect, a poorly fitted mask can create constant air leaks and discomfort. Sometimes the issue isn’t the mask—it’s the settings that make it harder to maintain a seal.
Tips for Better Mask Fit
- Adjust while lying down, not sitting—your face shape changes.
- Use the fit-check function available on most CPAP machines.
- Loosen straps, don’t overtighten—tightening too much causes more leaks.
- Replace cushions regularly to maintain seal quality.
If pressure increases during sleep due to APAP adjustments, you may also need a more stable mask style.
Auto-CPAP vs. Fixed CPAP: Which Offers Better Comfort?
Auto-adjusting CPAP machines (APAP) are often more comfortable because they raise and lower pressure based on your breathing. This helps reduce side effects like air swallowing, leaks, or pressure discomfort.
Benefits of Auto-Adjusting Pressure
- More natural breathing
- Less dryness
- Fewer leaks
- Lower average pressure
- Better comfort for side sleepers
If your fixed pressure feels uncomfortable despite adjustments, it may be time to explore APAP therapy.
Final Thoughts: Fine-Tuning CPAP Settings Can Transform Your Sleep
Adjusting your CPAP settings isn’t just about comfort—it’s about making therapy more effective and sustainable. The right combination of pressure, ramp, humidity, and mask fit can dramatically reduce CPAP side effects and turn your nightly routine into a calmer, more restful experience.
By understanding how to adjust CPAP settings for better comfort and fewer side effects, you give yourself the best chance at long-term success with your therapy.


